# Component Integration
Once a component is developed, and its image published in some accesible registry, we need to integrate it into the CaaS Framework. The CaaS Framework runs in a [Kubernetes](https://kubernetes.io/) cluster. The integration of a new component consist in adding the component manifests files to the repository and extending the Kustomization file to include those manifests files in the deployment.
This document contains the guidelines for integrating a new component into the CaaS Framework. The integration is based in merge requests. The merge request will be reviewed by the project maintainers and, if accepted, merged into the main branch.
The merge request should be based in the followingpreliminar actions:
- Creation of a folder containing the manifests files for the components.
- Edit the required sections in the Kustomization file in order to include those manifests in the CaaS Framework deployment.
In the following sections we explain how to create the merge request with the required information.
## Table of contents
- [Merge request initialisation](#merge-request-initialisation)
- [From an issue](#from-an-issue)
- [From a branch before adding the component](#from-a-branch-before-adding-the-component)
- [(Optional) Download the branch and add the component](#optional-download-the-branch-and-add-the-component)
- [From a branch after adding the component](#from-a-branch-after-adding-the-component)
- [Create the component folder](#create-the-component-folder)
- [Add the component manifests files](#add-the-component-manifests-files)
- [ConfigMaps](#configmaps)
- [Secrets](#secrets)
- [Extend the Kustomization file](#extend-the-kustomization-file)
- [Kustomize resources](#kustomize-resources)
- [Kustomize configMapGenerator](#kustomize-configmapgenerator)
- [Kustomize secretGenerator](#kustomize-secretgenerator)
- [Kustomize check configuration](#kustomize-check-configuration)
- [Testing the kustomize](#testing-the-kustomize)
- [Getting the kubeconfig](#getting-the-kubeconfig)
- [Check the deployment in the kubernetes cluster](#Acces-the-kubernetes-cluster)
- [Submit the merge request](#submit-the-merge-request)
## Merge request initialisation
There are many ways to create a merge request in GitLab. In this section we will explain three of them.
- From an issue (recommended way).
- From a branch (before adding the component)
- From a branch (after adding the component)
### From an issue
This is the recommended way to create a merge request. The issue should be created before starting the integration of a new component into the CaaS Framework.
- [Create a new issue](../../../-/issues/new)
You can additionally link the issue with the [requirement](https://git.code.tecnalia.com/emerald/private/requirements/-/issues) that this issue contributes to fulfil.
Once the issue is created, you can create a linked merge request by clicking on the <kbd>**Create merge request**</kbd> button in the issue page. That will also create a new branch in the repository that hold the changes. When the merge request is accepted, the linked issue will be automatically closed.
The merge request will be annotated as **draft** so that you can work without the intervention of the project maintainers. Once the component is ready for review, you can change the status of the merge request to **ready for review**.
### From a branch *before* adding the component
This is an alternative way to create a merge request. You can create a new branch in the repository and then create a merge request from that branch. It is recommended to create the merge request as a **draft**, so that you can work without the intervention of the project maintainers. Once the component is ready for review, you can change the status of the merge request to **ready for review**.
#### (Optional) Download the branch and add the component
If you create the branch in the GitLab interface before adding the component, you can download the branch as follows:
```bash
git clone git@git.code.tecnalia.com:emerald/private/devops/CaaS-framework.git
cd CaaS-framework
git checkout feature/component_integration
```
### From a branch *after* adding the component
Another way to work is to clone the GitLab repository, add the component in a new branch, push it to the repository, and then create a merge request from that branch.
```bash
git clone git@git.code.tecnalia.com:emerald/private/devops/CaaS-framework.git
cd CaaS-framework
echo "Add the component files to the repository"
git checkout -b feature/component_integration
git add .
git commit -m "Add the component files"
git push origin feature/component_integration
```
## Create the component folder
The first step to integrate a new component into the Caas Framework is to create a folder in the repository to hold the component manifests files. The folder should be created inside the components folder of the repository and should have the name of the component. The folder will contain the manifests files of the component.
E.g., for the amoe component, the folder should be named `amoe` and should contain the manifests files of the component.
```bash
mkdir components/amoe
```
There are different types of manifests files, depending on the type of component. The most common types are:
- [jobs](https://kubernetes.io/docs/concepts/workloads/controllers/job/)
- [services](https://kubernetes.io/docs/concepts/services-networking/service/)
- [deployments](https://kubernetes.io/docs/concepts/workloads/controllers/deployment/)
- [ingresses](https://kubernetes.io/docs/concepts/services-networking/ingress/)
### Add the component manifests files
The next step is to add the component manifests files to the created folder. We recommend to prepend the name of the file with a number to indicate the order in which the files should be applied. There are examples into the `rcm` component [folder](https://git.code.tecnalia.com/emerald/private/devops/caas-framework/-/tree/master/rcm?ref_type=heads)
### ConfigMaps
It is recommended to create Configmaps using the `kustomize` tool. The contents of the ConfigMaps for the component should be stored in a folder `configmaps` in the component folder (i.e. `components/amoe/configmaps`).
### Secrets
The Secrets will be created using the `kustomize` tool. The files to be used for the secrets generation SHOULD NOT BE STORED in the repository. Fot that, the secrets should be added in the LOCAL component folder, in a folder named `.secrets`, and should be excluded from the repository adding the `.secrets/` folder to the `.gitignore` file.
## Create the Kustomization file for the component
The next step is to create the Kustomization file for the component. The Kustomization file is a YAML file that contains the list of the manifests files that should be included in the deployment. The Kustomization file should be located in the root of the component folder and should be named `kustomization.yaml`.
To create the Kustomization file you can use the `kustomize` tool. The `kustomize` tool is a CLI tool that allows you to manage the Kustomization file. To install the `kustomize` tool you can follow the instructions in the [official documentation](https://kubectl.docs.kubernetes.io/installation/kustomize/).
To use it over the component folder, you should be placed in the component folder in order to focus the `kustomize` tool in your component.
```bash
cd components/amoe
kustomize create --resources .
```
The relevant sections in the Kustomization file are:
- `resources`
- `configMapGenerator`
- `secretGenerator`
### Kustomize resources
The `resources` section contains the list of the manifests files that should be included in the deployment. The manifests files should be relative to the root of the repository.
### Kustomize configMapGenerator
This section contains the list of the ConfigMaps that should be included in the deployment. If we follow the previous example, the ConfigMaps should use the `configmaps` folder in the component folder.
### Kustomize secretGenerator
This section contains the list of the Secrets that should be included in the deployment. The secrets should be in the root of the repository and they should be excluded from the repository in the `.gitignore` file.
The secrets should be added to the GitLab [CI/CD variables](https://docs.gitlab.com/ee/ci/variables/#define-a-cicd-variable-in-the-ui) as files. The files should be named with the name of the secret and should contain the secret value. (Latter, during the CI/CD pipeline execution, the secrets will be taken from a temporary folder and will be added to the root of the repository by the `k8s-pre-apply.sh`.)
In summary, the steps to add a secret are:
1. Create the secret file in the component folder, to verify the kustomize configuration.
2. Add configuration in the `kustomization.yaml` file to include the secret file.
3. Check the kustomize configuration.
4. Add the secret CI/CD setup at the end of the `k8s-pre-apply.sh` file.
5. Request to some GitLab project [owner or maintainer](https://git.code.tecnalia.com/emerald/private/devops/CaaS-framework/-/project_members) to create the secret in the GitLab CI/CD variables.
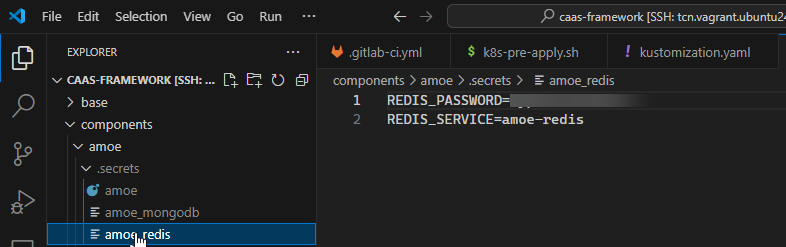
This is an example of the secret file creation and kustomize configuration:
```bash
cd components/amoe
cat <<EOF > .secrets/amoe_redis
REDIS_PASSWORD=redis_password
REDIS_SERVICE=redis_service
EOF
echo "add amoe_redis secrets configuration in the kustomization.yaml file"
echo <<EOF
- name: amoe-redis
options:
disableNameSuffixHash: true
envs:
- .secrets/amoe_redis
EOF
vi kustomization.yaml
cd ../..
echo 'copy_from_cicd_variables "amoe_redis_secrets" "components/amoe/.secrets/amoe_redis"' >> k8s-pre-apply.sh
```
Once the secret is placed in the GitLab CI/CD variables, the `k8s-pre-apply.sh` script will add the secret to the root of the repository.
## Add Keycloak configuration
Follow the [Keycloak integration](keycloak_integration.md) guidelines to add the Keycloak configuration to the component.
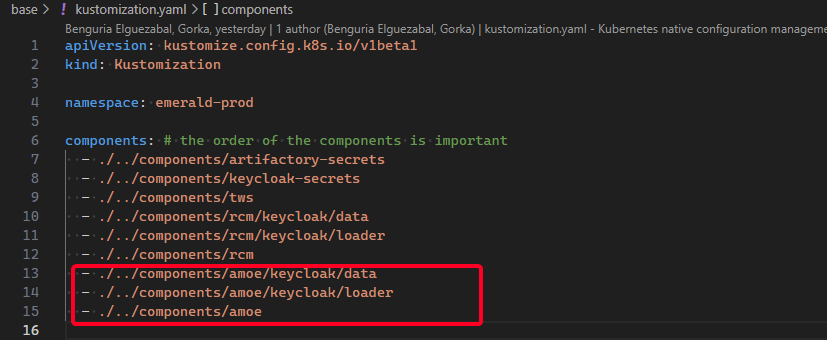
## Add the component to the base
The next step is to add the component to the base. The base is the base folder of the repository and contains the Kustomization file that includes all the components.
## Kustomize check configuration
The `Kustomize` tool allows you to check the configuration of the Kustomization file. The `kustomize` tool has a command to check the configuration of the Kustomization file. The command is:
```bash
kustomize build `path`
```
We can apply different paths depending what we want to check. For example, to check the configuration of the component folder we can use the following command:
```bash
kustomize build components/amoe
```
To check the whole integration we can use the following command:
```bash
kustomize build integration
```
## Testing the kustomize
The next step is to test the kustomize configuration. The `kustomize` tool has a command to test the configuration of the Kustomization file. The command is:
```bash
kubectl config use-context local
kustomize build . | kubectl apply -f -
```
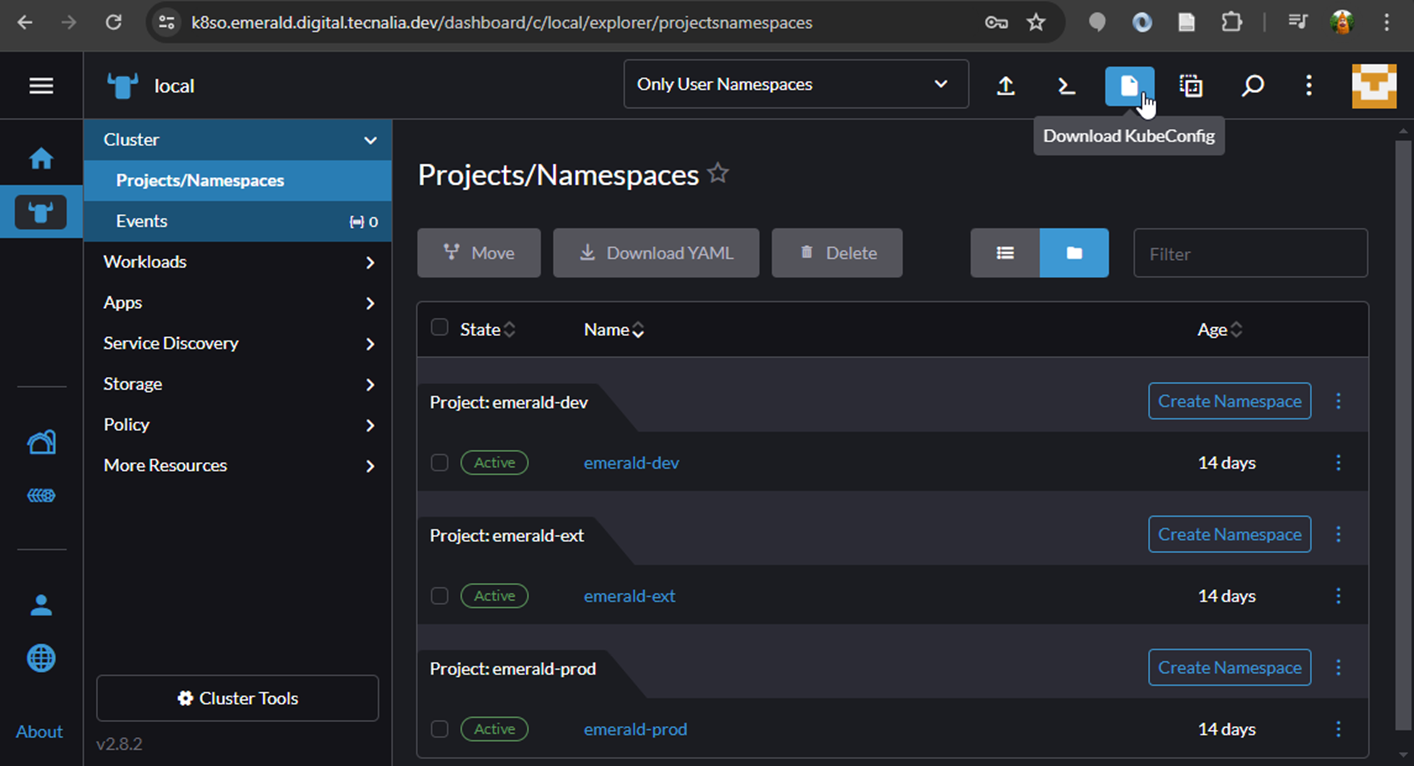
### Getting the kubeconfig
Yo need the KubeConfig file to access to the Kubernetes cluster from kubctl.
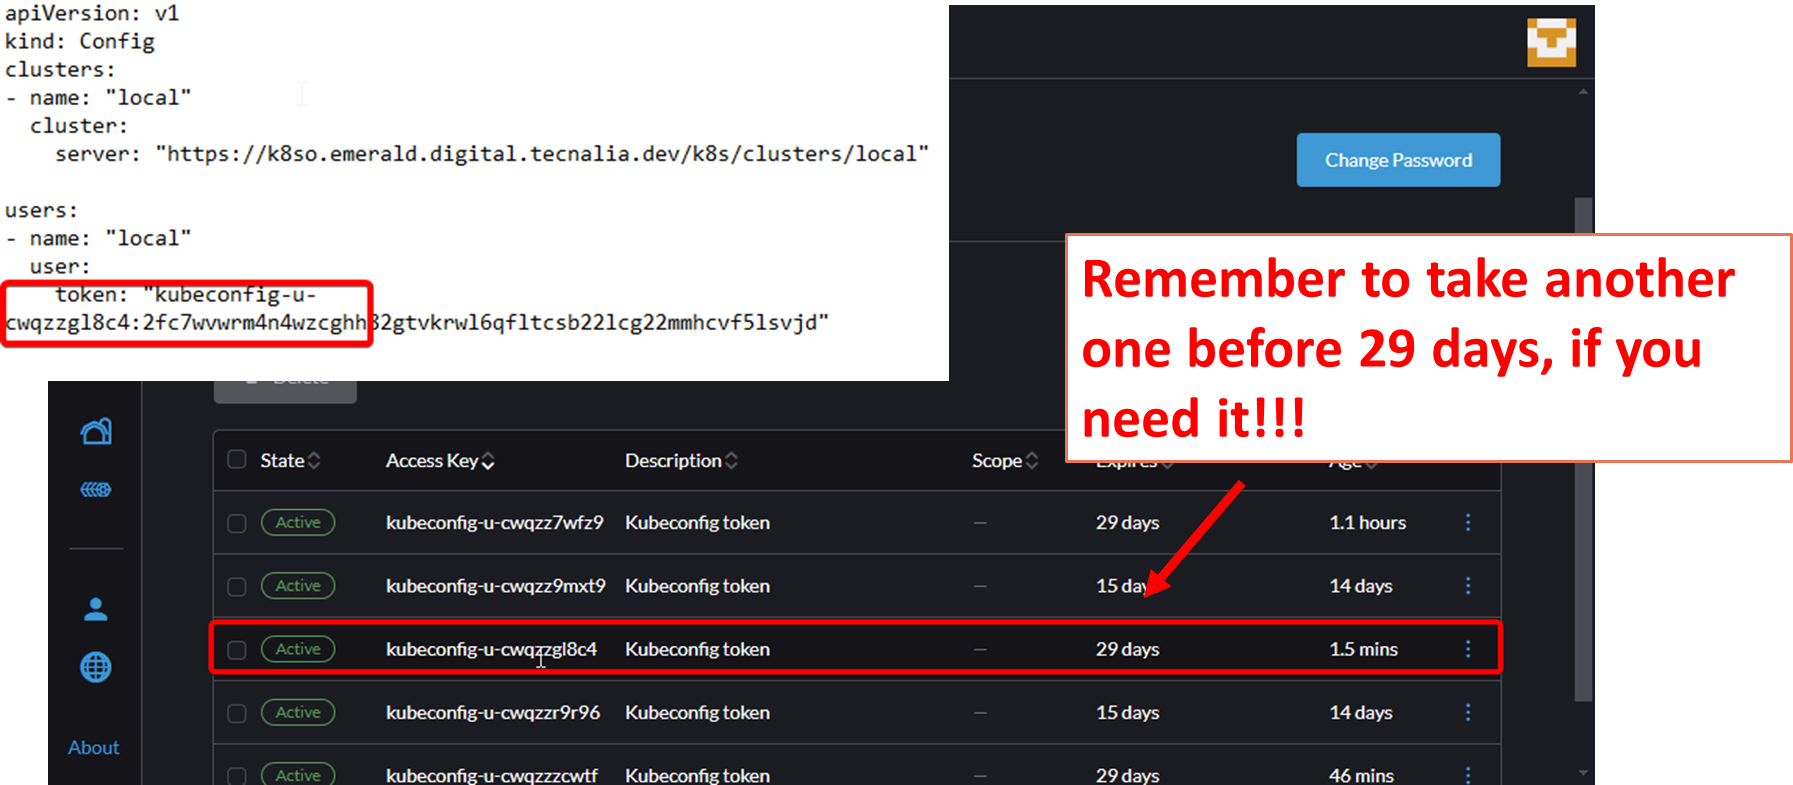
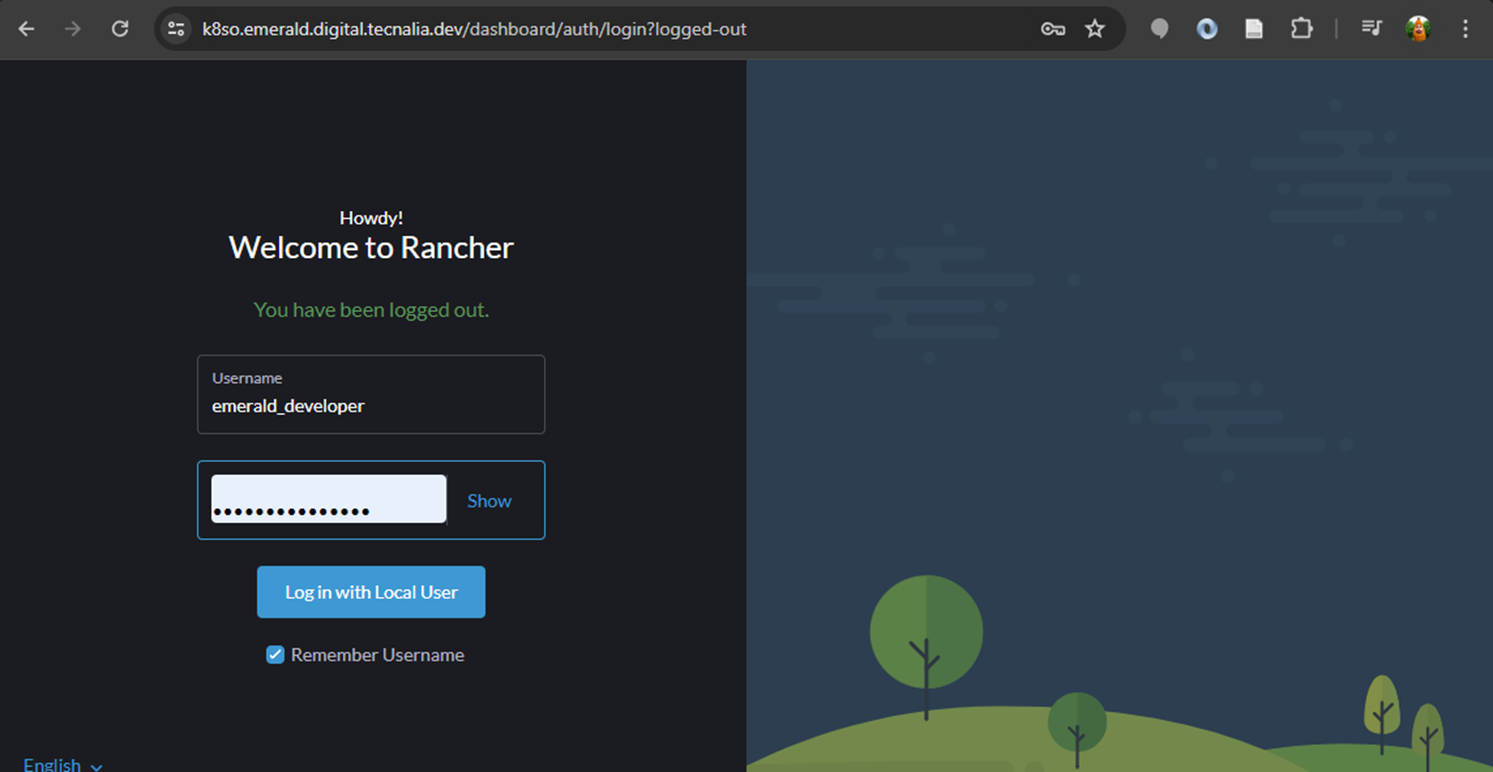
To get the kubeconfig, login into kubernetes https://k8so.emerald.digital.tecnalia.dev/ and download the kubeconfig (see figure below). **Be aware that the kubeconfig is valid for one month**.
{width=400}
{width=400}
The kubeconfig should be stored in the LOCAL `~/.kube/config` file.
```bash
cat << EOF > ~/.kube/config
<content of the kubeconfig file>
EOF
```
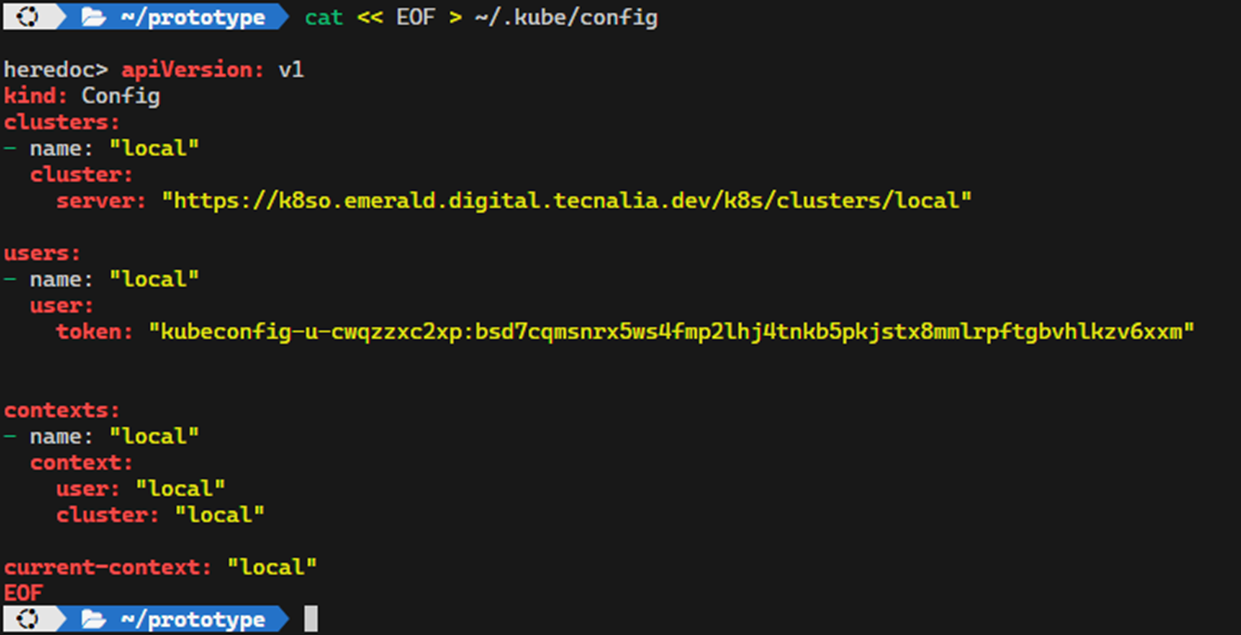{width=50%}
NOTE: The above is valid for one kubernetes cluster. If you have more than one kubernetes cluster, you can store the kubeconfig in different files and use the `KUBECONFIG` environment variable to select the kubeconfig file.
```bash
kubectl config get-contexts
kubectl config use-context local
```
### Check the deployment in the kubernetes cluster
The EMERALD kubernetes cluster includes a [Rancher server](https://ranchermanager.docs.rancher.com/) to access the cluster. The rancher is available at https://k8so.emerald.digital.tecnalia.dev/.
{width=400}
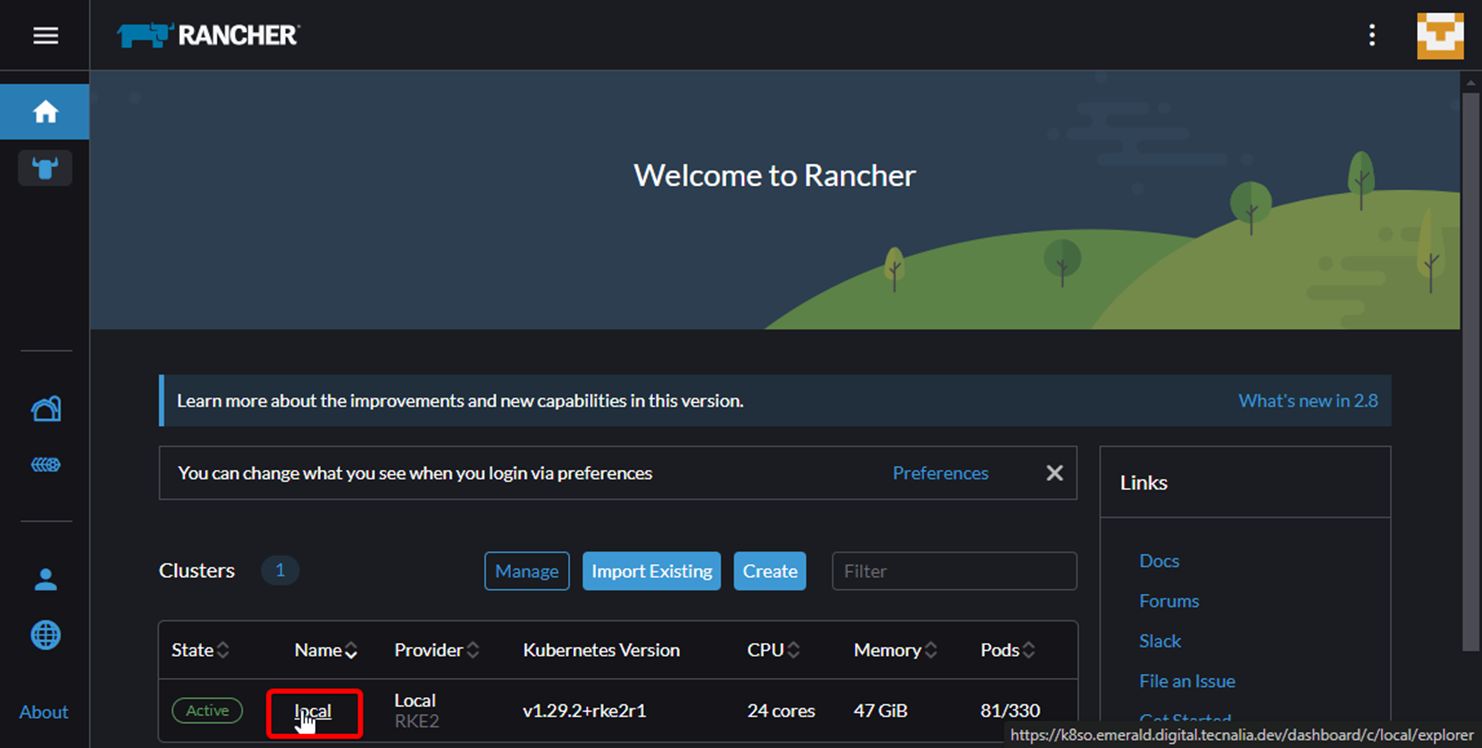{width=400}
There, you can access the kubernetes cluster and check the deployment of the component.
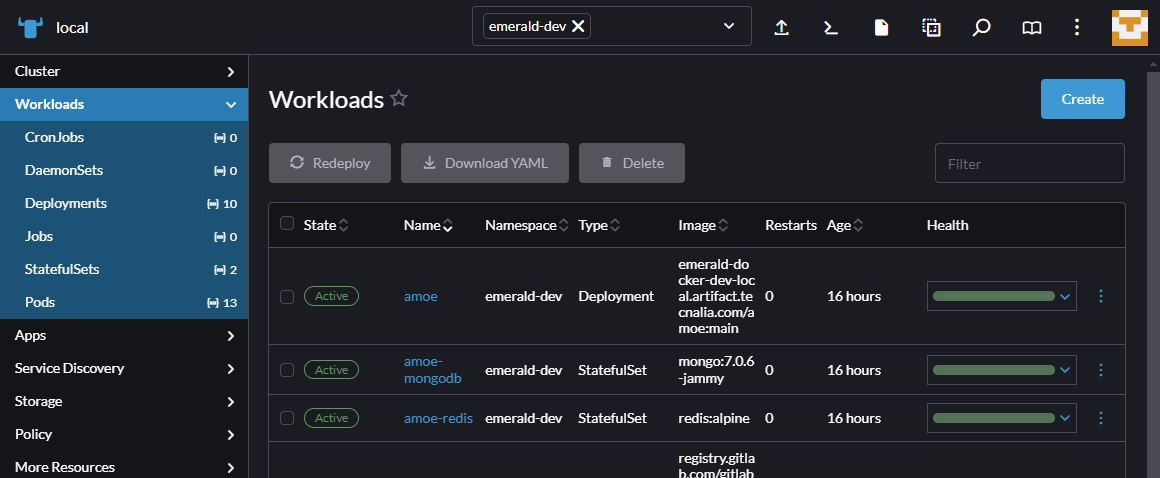{width=400}
## Submit the merge request
Finally, you can submit as many commits as you need to the branch. Once the component is ready for review, you can change the status of the merge request to **ready for review**. The project maintainers will review the merge request and, if it is accepted, they will add a final commit for semantic versioning and willmerged it into the main branch.
[^k]: https://kubernetes.io/es/